All art projects & crafts require adult supervision. This post may contain affiliate links. Read our full disclosure policy.
Thanksgiving is just around the corner, and what better way to get into the holiday spirit than with a creative and fun art project for kids? This "Turkey Run Art Project" is a fantastic way to engage your little ones in a craft that's not only entertaining but also allows them to showcase their artistic skills.

The best thing about this craft is that the Turkey actually runs. Did you know that wild turkeys are surprisingly fast runners? They can reach speeds of up to 20-25 miles per hour on the ground. This agility helps them evade predators and is quite impressive for a bird of their size. Domestic turkeys, bred for consumption, are generally heavier and not as fast as their wild counterparts.
To get started you will need to gather these materials:
Turkey Run Template (Free to download)
White Cardstock Paper
Scissors
Coloring items (such as crayons, markers, or colored pencils)
Hot glue gun
A straw

Step 1: Download and Print the Turkey Emotions Spinner
To begin your Turkey Run art project you need to download and print the template. This download is available to all members for FREE! You heard me correctly, memberships are free to join for everyone who is 18 years an older! . Click on the link to signup and to find the Template.
I recommend printing the Turkey Run Template on 8.5x11 white cardstock paper. The thicker the paper the better. This craft will not work with regular copy paper.

Step 2: Color Your Turkey
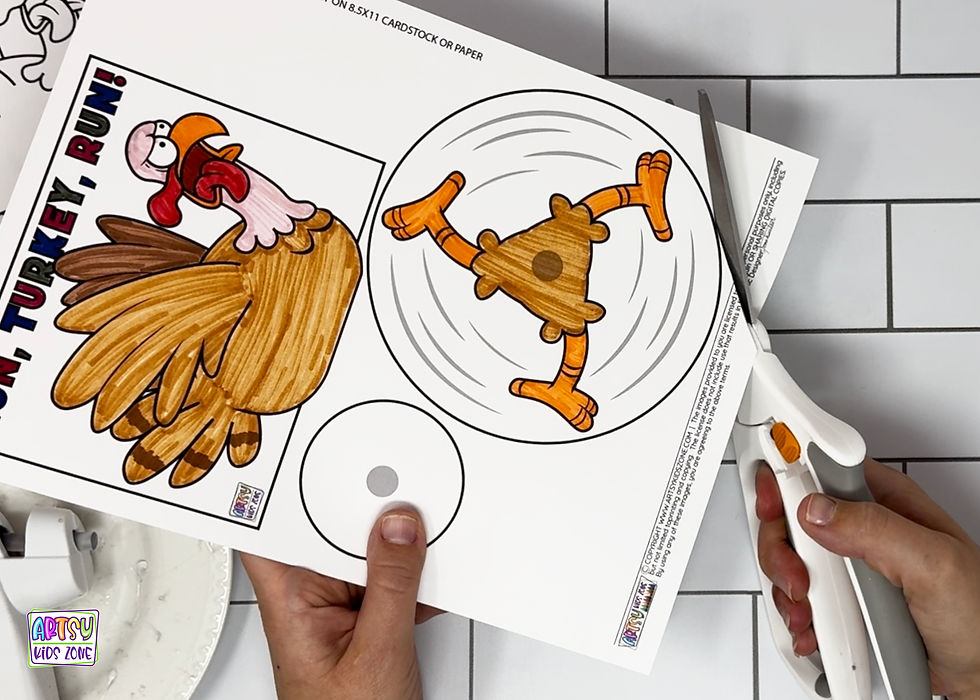
Unleash your child's creativity by coloring the turkey template. Let them choose vibrant colors that make their turkey truly unique. From rich browns and reds to any other hues they desire, it's a great opportunity to explore their artistic side.

Step 3: Cut Out with Scissors
Once the turkey is beautifully colored, carefully cut it out with a pair of scissors. Make sure to use child-safe scissors, and if your child is younger, you can provide assistance during this step.

Cut out the center circle on the legs only, ensuring that the hole is slightly larger than the diameter of the straw.

Step 4: Hot Glue the Straw
Here comes the exciting part! Fire up the hot glue gun (adults, please take charge here) and apply a small amount of hot glue in the center of the circle.

Secure the straw in the center and allow the glue to fully cool and harden.

Step 5: Trim the Straw
Trim the straw to approximately 1/4 of an inch or even smaller if you prefer. This will allow your turkey to glide smoothly as it races across the table.

Step 6: Insert the Legs and Glue the Straw
Carefully insert the turkey's legs through the straw.

Step 7: Finish Gluing The Turkey Run Template Together
Next, using the hot glue gun, apply a small amount of glue to the center at the bottom on the back of the turkey.

Fasten the straw securely to the back of the turkey, taking care that the glue doesn't come in contact with the circle containing the legs. Hold the straw in place until the glue fully hardens to prevent any unintended contact.
Now, watch your running turkey in action! You can push it across the table to spin it with your fingers. It's an entertaining and interactive craft that your child will be proud to display. Plus, it's a perfect addition to your Thanksgiving festivities.
Turkey-tastic and thankful for this craft? Don't waddle away just yet—there's more festive fun in store for Thanksgiving! From creating your own table decorations to whipping up delightful place cards, the world of Thanksgiving art projects is at your fingertips. More holiday-inspired fun awaits with these Thanksgiving projects!


Comments